


Constructing a Sustainable DIY Pallet Shed: A Comprehensive Guide
This document provides a detailed plan for constructing a durable and environmentally friendly shed using reclaimed shipping pallets. The project emphasizes sustainability, minimizing waste, and maximizing the utilization of readily available materials. Detailed instructions are provided for each stage, ensuring a successful build even for novice DIY enthusiasts. This guide assumes a basic understanding of woodworking tools and techniques.
Phase 1: Planning and Material Acquisition
Before commencing construction, meticulous planning is crucial for a successful outcome. This phase involves determining the shed's dimensions, sourcing materials, and preparing the site.
1.1 Determining Shed Dimensions and Design
The dimensions of your pallet shed will depend on your specific needs and available space. Consider the intended use of the shed â€" storage of gardening equipment, tools, or other items. Sketch a basic design, noting the desired length, width, and height. A rectangular design is generally the simplest to construct. Typical dimensions for a small shed might range from 6ft x 8ft to 8ft x 10ft. Remember to account for the standard dimensions of shipping pallets (typically 48 inches x 40 inches) when determining your overall dimensions.
1.2 Sourcing Reclaimed Pallets
The cornerstone of this project lies in sourcing high-quality reclaimed shipping pallets. Inspect potential pallets carefully for damage, rot, and pest infestation. Prioritize pallets constructed from sturdy hardwood, as these will offer greater durability. Obtain sufficient pallets to cover the walls, roof, and floor of the shed, accounting for potential waste during construction. Contact local businesses such as grocery stores, warehouses, and construction sites, as they often have surplus pallets available for free or at a minimal cost. Ensure you obtain permission before collecting pallets from private property.
1.3 Site Preparation
Choosing an appropriate location is vital. Select a level, well-drained area that is readily accessible. Clear the chosen area of any vegetation, debris, or obstacles. Mark out the footprint of the shed using stakes and string, ensuring accurate dimensions. If the ground is uneven, consider leveling the site using gravel or compacted soil to create a stable base for the shed.
Phase 2: Shed Construction
This phase details the construction process, focusing on building the frame, walls, roof, and floor of the shed. Safety precautions should be followed at all times, including wearing appropriate safety gear.
2.1 Building the Frame
Construct a sturdy frame using pressure-treated lumber or reclaimed wood of comparable strength. The frame will provide support for the pallet walls and roof. Cut the lumber to the desired lengths according to your shed’s dimensions. Assemble the frame using screws or bolts, ensuring squareness and stability at each corner. Use a spirit level to ensure all components are perfectly level and plumb.
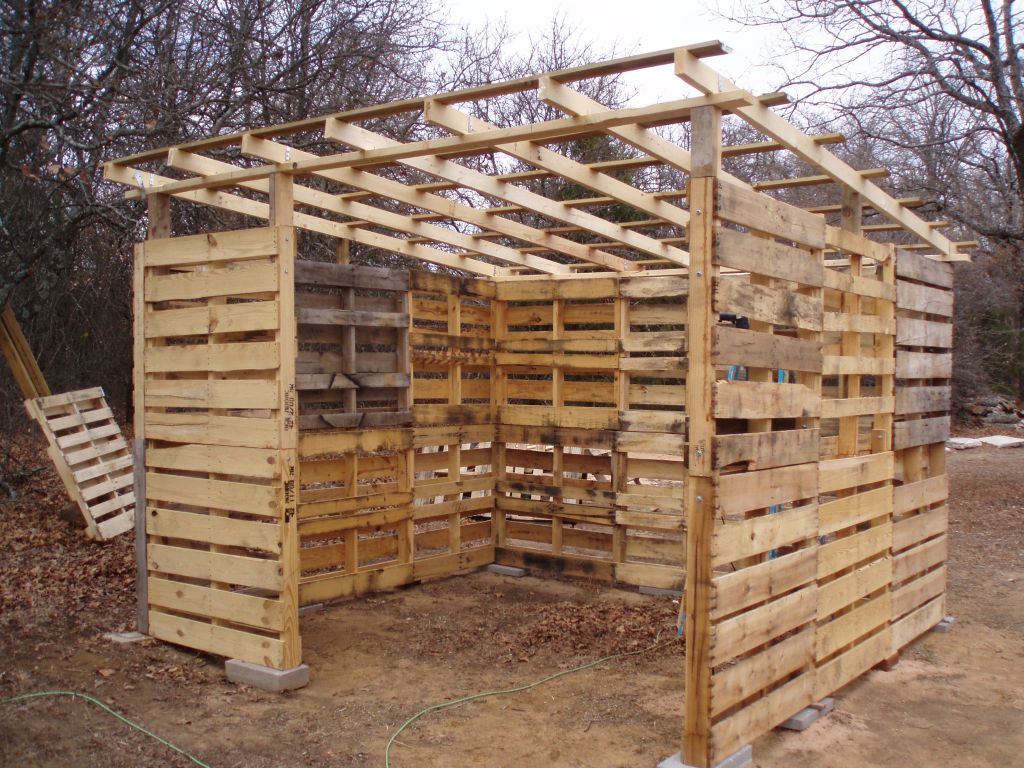
2.2 Attaching the Pallet Walls
Carefully inspect each pallet for any loose boards or nails before attaching them to the frame. Using appropriate fasteners such as screws or strong nails, attach the pallets to the frame, ensuring a tight and secure fit. You may need to cut or adjust some pallets to fit perfectly. For added stability, consider using metal brackets or straps to reinforce the connections between pallets and the frame.
2.3 Constructing the Roof
The roof design depends on your preference and local climate. A simple gable roof is a common and relatively easy-to-construct option. Create the roof rafters using pressure-treated lumber and attach them to the top of the frame. Use a suitable roofing material such as reclaimed corrugated metal sheets, recycled plastic sheeting, or even more pallets (requiring additional bracing). Ensure adequate overhang to protect the walls from rain and snow. Seal all joints and seams with appropriate weatherproof sealant to prevent water leakage.
2.4 Creating the Floor
The floor can be constructed using additional pallets or a more robust material like plywood or concrete. If using pallets, ensure they are treated for ground contact and positioned to maximize structural integrity. If using alternative materials, ensure a level surface for ease of access and structural support. Remember to leave a gap between the ground and the flooring for ventilation and moisture control. The floor can either be set directly on the ground or raised slightly for better drainage.
Phase 3: Finishing and Refinements
Once the basic structure is complete, several finishing touches will enhance the shed's functionality, durability, and aesthetics.
3.1 Weatherproofing and Sealing
Apply a weatherproof sealant to all joints and seams to protect the wood from moisture damage. This will extend the life of the shed and prevent rot. Consider using a wood preservative to further protect the pallets from the elements.
3.2 Door and Window Installation
Install a sturdy door and potentially windows to provide access to the shed and natural light. You can create a door frame from reclaimed lumber and fit a reclaimed door or construct a new one. Windows can be salvaged from old frames or purchased new. Ensure proper sealing around the door and window frames to prevent drafts and water leakage.
3.3 Interior Finishing
Consider adding shelving or other interior storage solutions to maximize the shed’s usability. Shelving can be constructed from additional pallets or from other reclaimed wood. Ensure any interior work is compatible with the overall structure of the shed.
Phase 4: Sustainability Considerations
This project prioritizes sustainability through material selection and construction techniques. By reusing reclaimed pallets, the project minimizes waste and reduces the demand for new materials. The following points further emphasize the sustainability aspect:
- Source locally: Sourcing pallets locally reduces transportation emissions.
- Minimize waste: Plan carefully to minimize cutting and waste of pallet wood.
- Use reclaimed materials: Utilize reclaimed lumber and other materials whenever possible.
- Employ eco-friendly finishes: Opt for low-VOC paints, stains, and sealants.
- Consider energy efficiency: Insulate the shed if needed to reduce energy consumption for climate control.
By following these detailed instructions and prioritizing sustainable practices, you can successfully construct a durable, environmentally friendly pallet shed that meets your specific needs. Remember that safety should always be your top priority throughout the entire construction process. Careful planning and attention to detail will ensure a rewarding and sustainable DIY project.


No comments:
Post a Comment
Note: Only a member of this blog may post a comment.