


Building Your Own Lean-To Shed: A DIY Guide for Outdoor Storage
Hey there, fellow DIY enthusiasts! So, you're looking to build a lean-to shed? Fantastic! It's a really rewarding project, and way more affordable than buying a pre-made one. Plus, you get to customize it exactly to your needs. This guide will walk you through the entire process, from planning to the final touches. Let's get started!1. Planning Your Lean-To Shed
Before you even think about grabbing a hammer, you need a plan. This isn't rocket science, but some forethought will save you headaches down the line.1.1 Choosing a Location
Where will your lean-to live? Consider these factors:
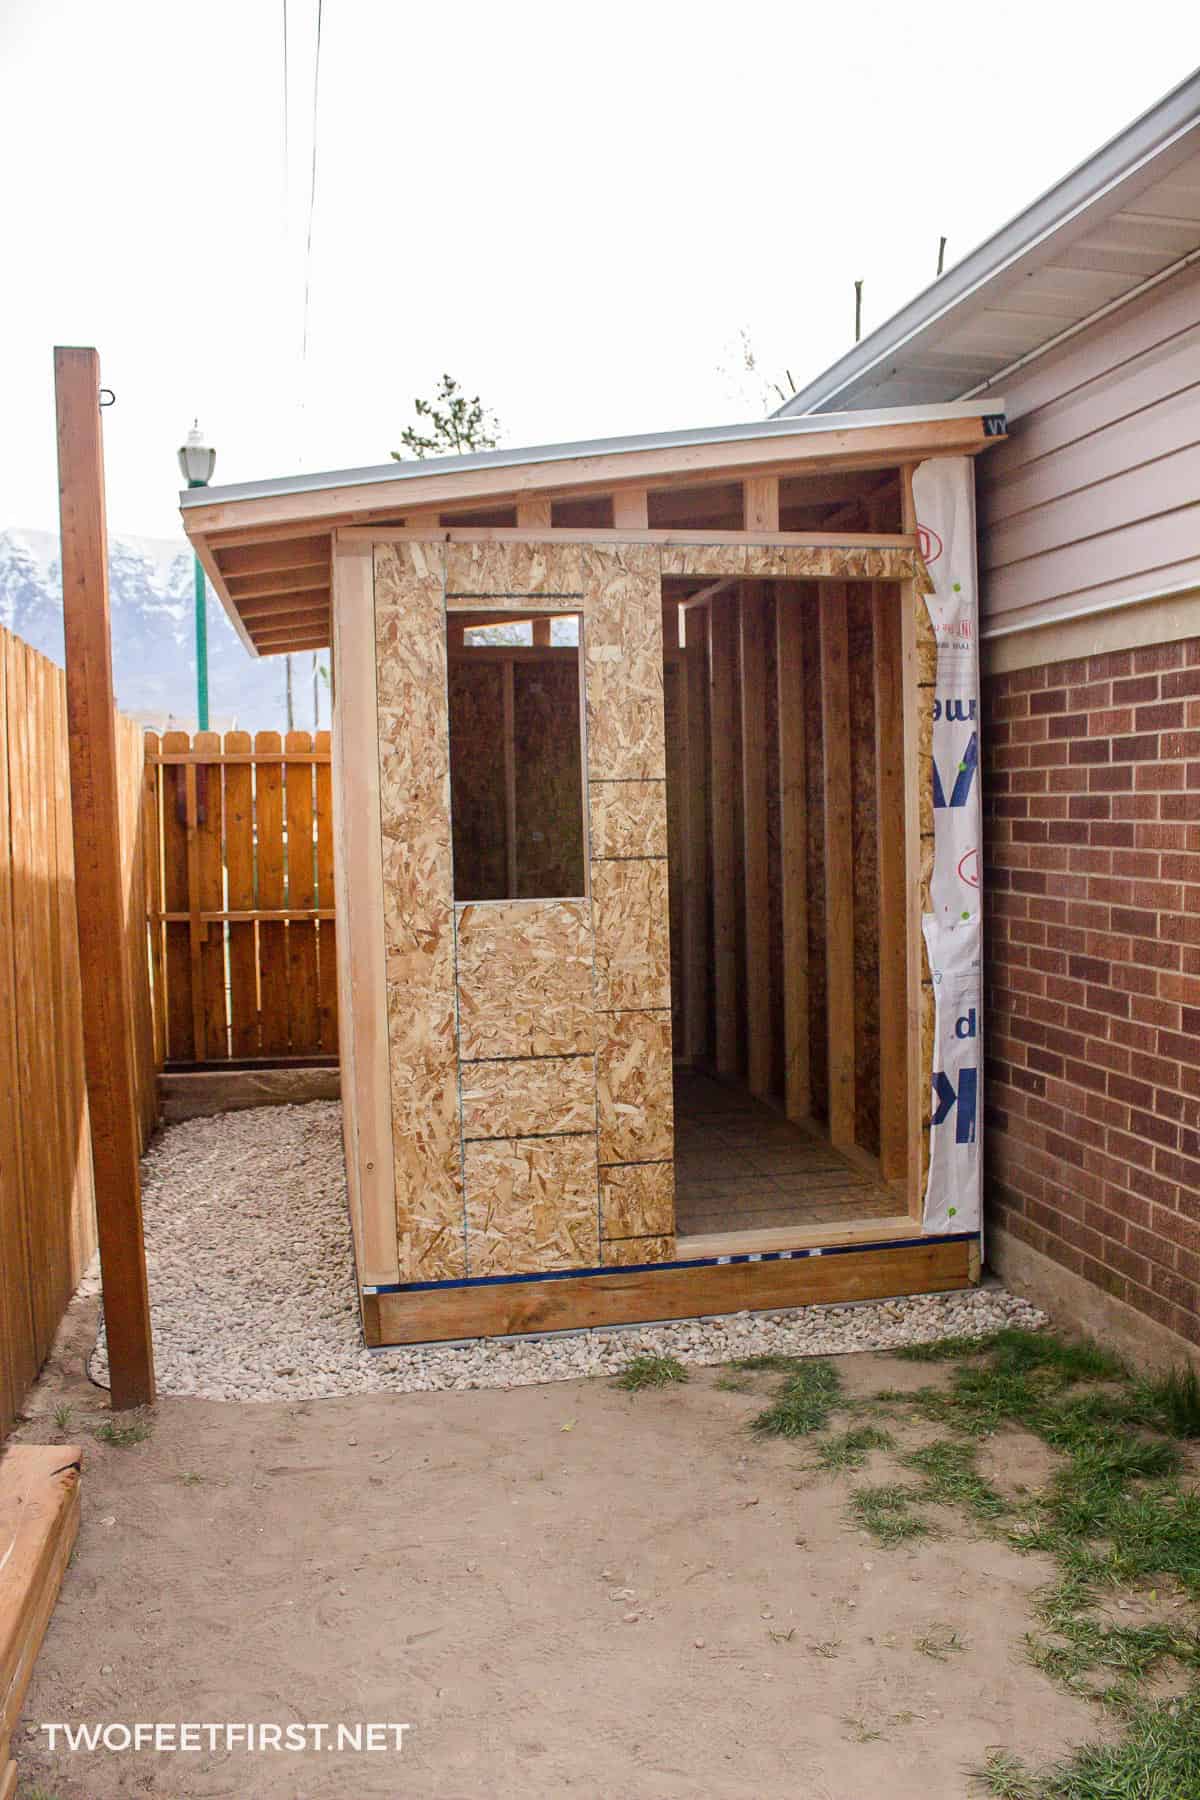
- Proximity to your house or another structure: This is crucial because the lean-to will need support from an existing wall.
- Level ground: Uneven ground makes for a wobbly shed. Leveling the area before you start is key.
- Sunlight and drainage: You want a spot that gets some sun (to help things dry out) but also drains well to prevent water damage.
- Local building codes: Check with your local authority to see if there are any permits or regulations you need to follow.
1.2 Determining Size and Materials
How much stuff do you need to store? A small lean-to might only be 4ft x 6ft, while a larger one could be 8ft x 12ft or even bigger. Remember, bigger means more materials and more work!
Next, the materials. Pressure-treated lumber is a great choice for the frame, as it’s weather-resistant. For the roof, you'll need roofing felt or shingles depending on your climate and budget. Consider using plywood for the back and sides if you want enclosed storage. You’ll also need screws, nails, a level, measuring tape, and all the usual tools.
2. Building the Frame
With your plan in hand, it’s time to build the frame. This is the structural backbone of your lean-to.
2.1 Attaching the Ledger Board
This is the horizontal piece that attaches your lean-to to the existing structure. Make sure it's securely fastened using appropriate fasteners â€" longer screws are better here for stability. Use a level to ensure it's perfectly horizontal â€" this is crucial for the rest of the build!
2.2 Building the Side Supports
These are the vertical supports that will hold up the roof. Cut your posts to the desired height, ensuring they’re plumb (perfectly vertical). Attach them to the ledger board and the ground using posts cemented into the ground.
2.3 Constructing the Roof Frame
Now, you’ll build the roof frame. This typically involves creating rafters that run from the top of the side supports to the ledger board. Make sure your rafters are evenly spaced and securely attached.
3. Roofing Your Lean-To
Time for the roof! This step is crucial for protecting your storage from the elements.
3.1 Installing Roofing Felt (or Underlayment)
Start with a layer of roofing felt or underlayment. This acts as a water barrier before the final roofing material. Overlap the sheets to create a waterproof seal.
3.2 Applying Roofing Material
Now, apply your chosen roofing material â€" asphalt shingles are a common and affordable option. Follow the manufacturer's instructions carefully. Work your way from the bottom up, overlapping each shingle slightly.
4. Adding Walls and Finishing Touches
This step is optional, but adding walls to your lean-to creates enclosed storage.
4.1 Building and Attaching Walls (Optional)
If you're adding walls, use plywood or similar material. Measure and cut the panels to fit between the support posts. Attach them securely to the posts and ledger board. Consider adding a door for easy access.
4.2 Finishing Touches
Once the structure is complete, add any final touches, like painting or staining the wood to protect it from the elements. You might also want to add shelving inside to maximize storage space.
5. Safety First!
Throughout this entire process, remember safety! Wear appropriate safety gear, including safety glasses and work gloves. Use caution when working with power tools. If you're unsure about any step, don't hesitate to seek help from a more experienced builder.
Commonly Asked Questions
Here are some questions I frequently get about building lean-to sheds:
Q: How long does it take to build a lean-to shed?
A: This depends on the size and complexity of your shed, and your experience level. A simple lean-to could take a weekend, while a more complex one might take several days or even a week.
Q: How much does it cost to build a lean-to shed?
A: The cost varies greatly depending on the size, materials used, and your location. You can expect to spend anywhere from a few hundred dollars to over a thousand.
Q: Do I need a permit to build a lean-to shed?
A: This depends on your local building codes and the size of the shed. It's always best to check with your local authority before you begin building.
Q: What kind of foundation do I need?
A: For a simple lean-to, you often don't need a complex foundation. Leveling the ground and securing the posts to the ground is usually sufficient. However, for larger or more permanent structures, you might need a more substantial foundation.
Q: Can I use reclaimed wood?
A: Absolutely! Using reclaimed wood is a great way to save money and be environmentally friendly. Just make sure the wood is in good condition and suitable for outdoor use.
Building a lean-to shed is a rewarding project that can add significant value to your property. Remember to plan carefully, work safely, and enjoy the process! Happy building!


No comments:
Post a Comment
Note: Only a member of this blog may post a comment.