


DIY Wood Pallet Shed: How to Turn Old Pallets into a Practical Shed
So, you've got a pile of old pallets lying around, taking up space and looking a little…sad? Don't despair! With a little elbow grease and some ingenuity, those seemingly useless pallets can transform into a surprisingly useful and charming shed. Building a shed from reclaimed pallets is a fantastic way to save money, be eco-friendly, and create something truly unique. This guide will walk you through the process, from planning to finishing touches. Let's get started!
1. Planning Your Pallet Shed: Dreaming Big (But Realistically)
Before you even think about touching a hammer, it's crucial to plan. Rushing into this project without a clear vision can lead to headaches (and potentially a wobbly shed!).
1.1 Size and Location:
Decide on the dimensions of your dream shed. How much storage space do you need? Consider the size of the pallets you have â€" this will largely dictate the final dimensions. Remember to check local building regulations regarding shed size and placement. You'll need a level, relatively stable surface for your foundation. Think about access â€" will you need to maneuver large items in and out?
1.2 Pallet Selection and Assessment:
Not all pallets are created equal. Inspect your pallets carefully. Look for:
- Structural integrity: Are the boards sound and securely fastened? Avoid pallets with significant rot, cracks, or loose nails.
- Wood type: Different woods have different properties. Hardwoods are generally more durable but can be harder to work with.
- Treatment: Check for markings indicating the type of treatment used. Some treatments might contain chemicals you don't want to handle.
- Quantity: Estimate how many pallets you'll need based on your desired size and design.
1.3 Design and Sketching:
Even a simple shed benefits from a basic plan. A quick sketch can help you visualize the layout, ensuring everything fits together. Consider features like a door, windows (if desired), and a roof style. You can find plenty of inspiration online â€" just remember to adapt designs to the size and condition of your pallets.
2. Gathering Your Tools and Materials:
Once you have your plan, it's time to gather your tools and materials. You'll need a mix of basic carpentry tools and some specialized items depending on your design.
- Measuring Tape and Level: Essential for accurate measurements and a level structure.
- Hammer and Pry Bar: For dismantling and assembling pallets.
- Screws and Drill: Screws are generally preferable to nails for greater strength and ease of disassembly if needed.
- Circular Saw or Hand Saw: To cut pallets to size.
- Safety Glasses and Gloves: Protect yourself from splinters and flying debris.
- Post Hole Digger (for a more permanent structure): If you're planning a more substantial shed, you'll need to dig holes for the foundation.
- Concrete Mix (optional): For setting posts in the ground.
- Wood Preservative (optional): To extend the life of your shed.
- Roofing Material: Tarps, corrugated metal, or even recycled shingles can be used.
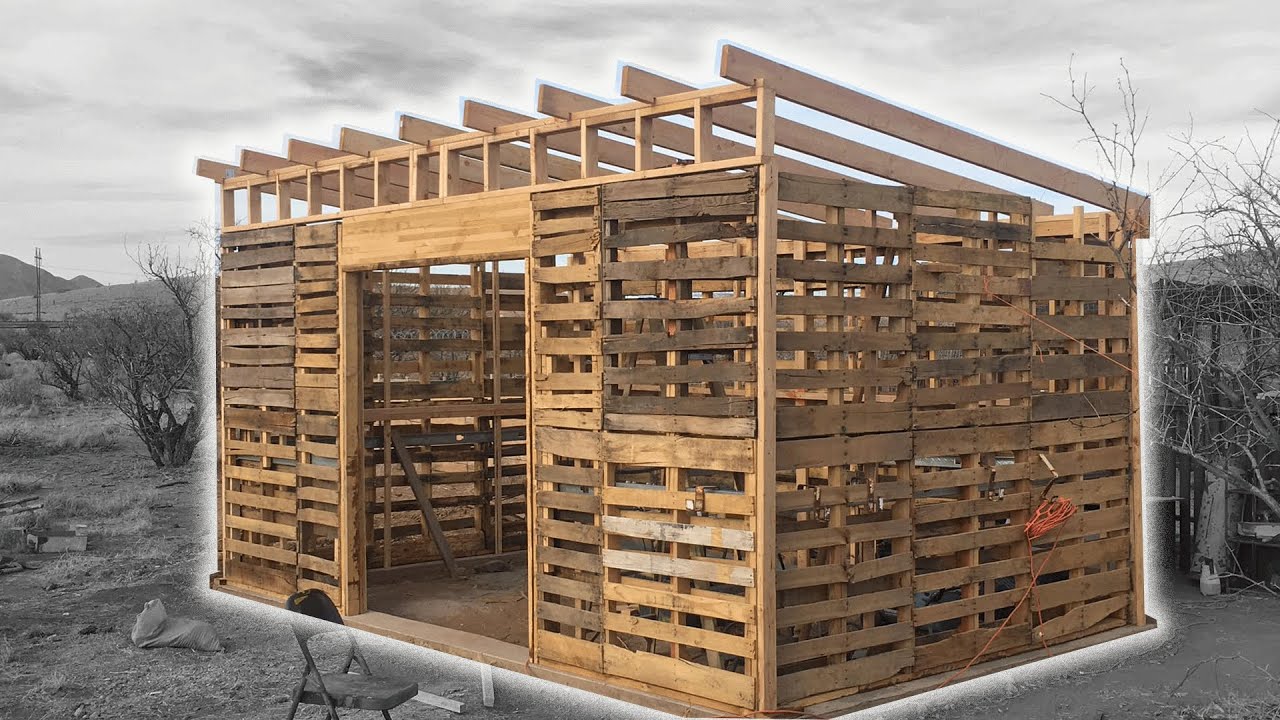
3. Construction: Building Your Pallet Shed
This is where the fun (and work!) begins. Remember to work in stages, ensuring each step is secure before moving on.
3.1 Foundation:
A solid foundation is vital. For a simple shed, a level area of compacted earth might suffice. For something more permanent, consider a concrete slab or setting pressure-treated posts in the ground.
3.2 Pallet Disassembly and Preparation:
Carefully dismantle the pallets, removing loose nails and damaged boards. Clean the boards and cut them to size as needed to fit your design.
3.3 Frame Construction:
Construct the frame of your shed using the prepared pallet boards. Use screws to create strong joints. Make sure the frame is square and level. This is where your plan will really come in handy. Think about bracing for added strength.
3.4 Wall Construction:
Once the frame is complete, begin adding the pallet sections to create the walls. You might need to adjust the placement of some boards for a more aesthetically pleasing result. Ensure the walls are plumb and securely attached to the frame.
3.5 Roof Construction:
The roof is a crucial element. Consider a simple gable roof for water runoff. Construct the roof frame and then cover it with your chosen roofing material. Make sure the roof is securely fastened to prevent leaks and wind damage.
3.6 Door and Window Installation (Optional):
If you're adding a door and/or windows, carefully measure and cut openings in the appropriate locations. Install your chosen door and window frames securely.
4. Finishing Touches: Making it Shine
Once the structure is complete, it's time to add the finishing touches.
- Sanding: Sand down any rough edges or splinters for safety and a smoother finish.
- Painting or Staining: Protect the wood and add a touch of personality with a coat of paint or stain. Consider weather-resistant options.
- Sealing: Apply a sealant to protect against the elements and increase longevity.
- Hardware: Install hinges, handles, and any other necessary hardware for doors and windows.
Frequently Asked Questions
Q: Are all pallets safe to use?
A: No. Some pallets are treated with chemicals that might be harmful. Check for markings indicating the treatment type. Heat-treated pallets are generally safe.
Q: How long will a pallet shed last?
A: The lifespan depends on the wood type, construction quality, and weather protection. Proper preparation and sealing can significantly extend its life.
Q: Do I need building permits?
A: This depends on your local regulations. Check with your local authorities before starting construction.
Q: Can I use other materials with the pallets?
A: Absolutely! You can incorporate other materials like plywood for sheathing or metal for roofing to enhance the shed's durability and appearance.
Q: What if I don't have many pallets?
A: You can adjust the design to work with the number of pallets you have. A smaller shed is still useful!
Building a shed from pallets is a rewarding project that combines resourcefulness with creativity. While it requires effort, the satisfaction of creating something functional and unique from repurposed materials is immeasurable. So grab those pallets and get building!
No comments:
Post a Comment
Note: Only a member of this blog may post a comment.